This chapter describes how objects can be used and interconnected.
Contents
To add an object from the toolbox to the modeling area, simply drag and drop the desired object from the toolbox to any position in the modeling area (see Figure 1).
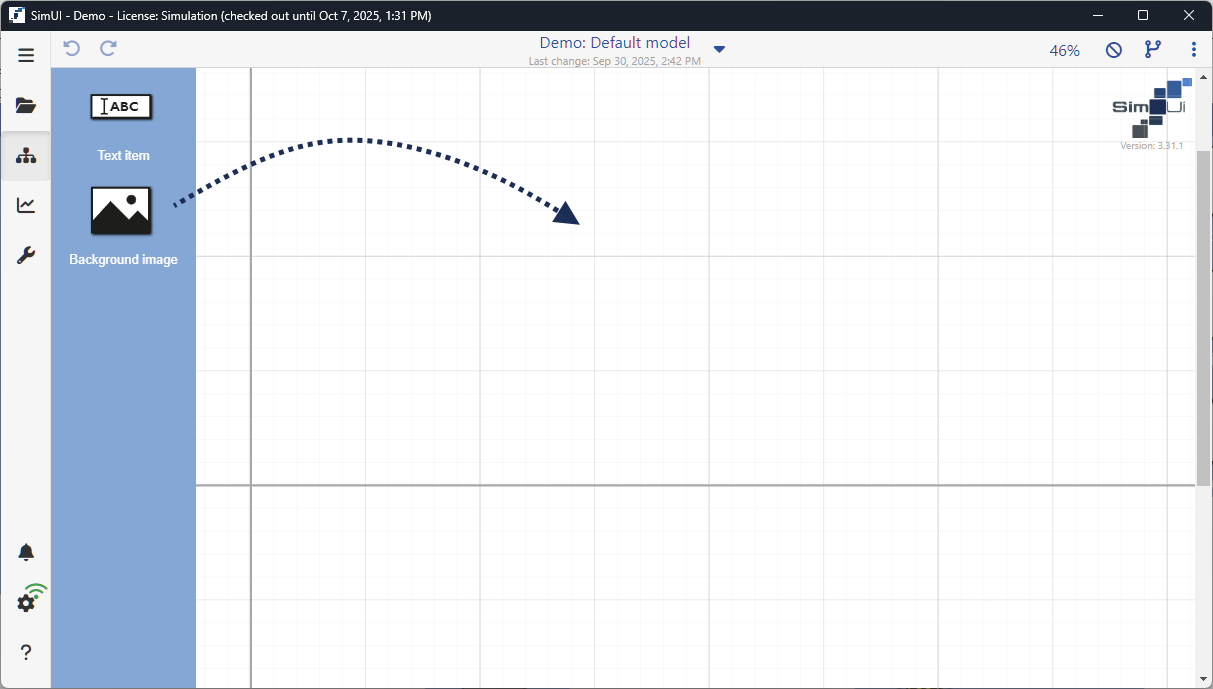
Figure 1 - Adding objects to the modeling area
To copy an existing object, the desired object must first be selected with the mouse. The selected object can then be copied and pasted using one of the following options:
•Using the key combination [CTRL] + C and [CTRL] + V
•By clicking on the desired object, then holding down the [CTRL] key and dragging the object to another location
•Copying and pasting objects is also possible between several alternatives of the same project
To select an object, simply click on the desired object with the mouse. You can also select several objects by holding down the [CTRL] key.
By holding down the mouse button for longer ("long click") a frame can be drawn up to mark serval objects (see Figure 2).
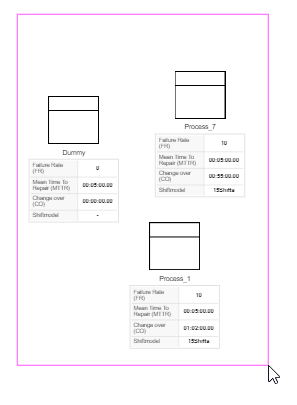
Figure 2 - Frame to mark multiple objects
Using the |
|
icon, all available objects can be parameterized. The options differ depending on the object. |
Data is imported via excel. Also an export to excel is possible via the button on the upper right side of the dialog.

Figure 3 - Edit data
© SimPlan AG - Hanau District Court, Commercial Register (Part B) 6845 - info@simplan.de - www.simplan.de